Warranties
How to Measure Roof Pitch Before a Project: An 8-Step Guide for Homeowners
Knowing how to measure roof pitch is one of the most useful things a homeowner can do before starting any roofing project, whether that means ordering materials, planning a repair, or simply having an informed conversation with a contractor. Roof pitch determines which materials can be used on your roof, how water drains, what labor costs to expect, and even how your home looks from the street. Getting this number right before a project starts prevents miscommunication, incorrect material orders, and surprises on the final invoice.
Here is what this guide covers:
- What roof pitch means and why it matters: A plain-language explanation of how pitch is measured and what the numbers actually tell you about your roof.
- Two safe methods for homeowners: How to measure from the attic and from the roof surface, with clear step-by-step instructions for each.
- What to do with the number: How to use your pitch measurement to understand material options, costs, and what to tell your contractor.
What Is Roof Pitch and Why Does It Matter?
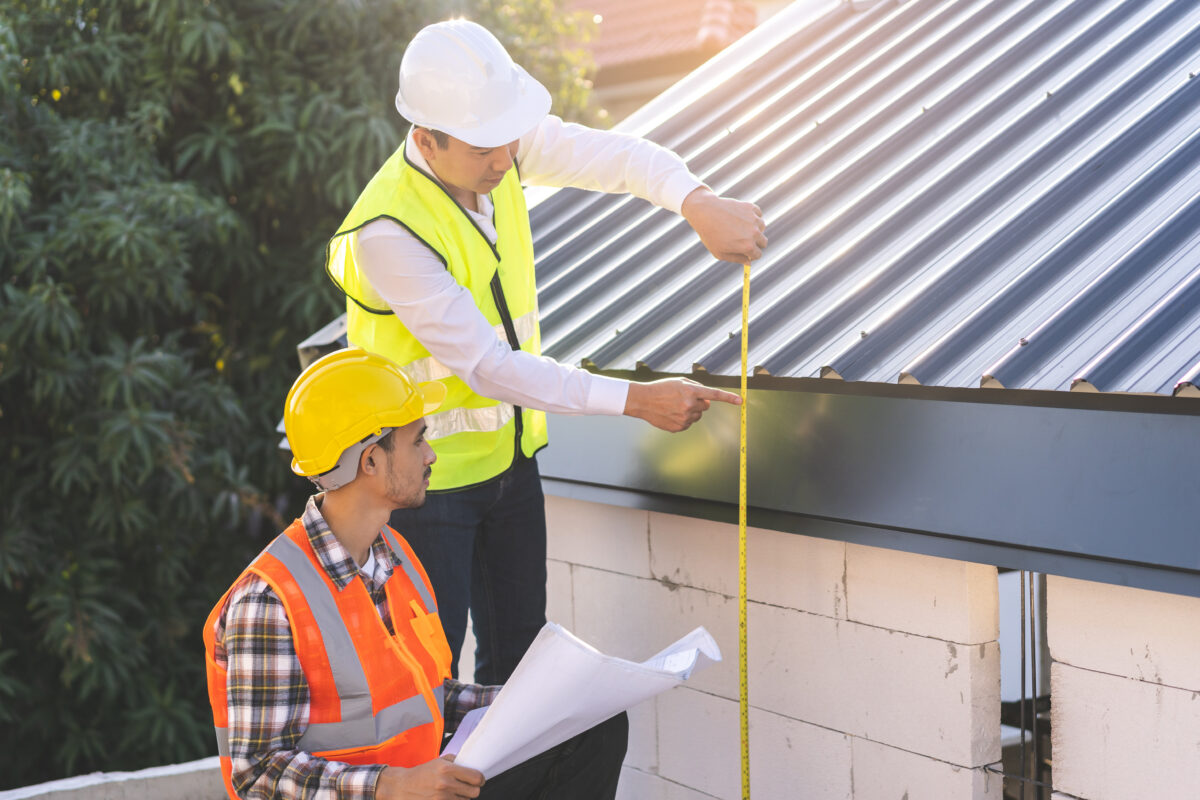
Roof pitch is the measure of how steep a roof is, expressed as a ratio of vertical rise to horizontal run. A 6/12 pitch means the roof rises 6 inches vertically for every 12 inches of horizontal distance. A 4/12 pitch is shallower. A 9/12 pitch is steeper. The 12 in the denominator is always fixed as the standard unit of horizontal run in residential roofing.
This single measurement affects nearly every decision made about a roof. It determines which shingles can be installed, whether special underlayment or starter strips are required, how much material is needed, and how much the labor will cost. Steeper roofs shed water and debris more efficiently, offer better attic ventilation, and tend to have longer material lifespans, but they also cost more to work on safely due to the additional equipment and precautions required. Low-slope roofs are easier to access but require specialized materials to prevent water infiltration at slower drainage speeds.
Most common residential roof pitches fall between 4/12 and 9/12. Anything below 2/12 is considered a low-slope or flat roof and requires membrane roofing systems rather than standard shingles. Anything above 9/12 is considered steep-slope and requires additional labor precautions and fastening methods.
What Tools Do You Need to Measure Roof Pitch?
Measuring roof pitch does not require specialized equipment. Most homeowners already have everything needed in their garage or toolbox. Gathering the right tools before you start makes the process faster and the result more accurate.
You need three things: a level that is at least 12 inches long, a tape measure, and a pencil or marker. A standard 24-inch carpenter’s level works well. A 12-inch torpedo level also works but gives you less surface area to work with, which can make it harder to hold steady. Some homeowners use a smartphone level app as a secondary check, though a physical level is more reliable for this measurement.
8-Step Guide to Measuring Roof Pitch
There are two safe approaches to measuring roof pitch: from inside the attic, and from the roof surface. The attic method is recommended for most homeowners because it does not require climbing on the roof and delivers equally accurate results. The roof surface method is an option for those comfortable working at heights with proper fall protection. Both methods follow the same underlying principle: measure how many inches the roof rises over a 12-inch horizontal run. The steps below cover both approaches in a single sequence, noting where the methods diverge.
1. Decide Whether to Measure From the Attic or the Roof Surface
The safest and most practical method for most homeowners is measuring from inside the attic. You get the same accurate result without the risks of working on a sloped surface at height. The attic method works by placing a level against the underside of a rafter and measuring the rise from there. If your attic is inaccessible or you prefer to measure from the exterior, the roof surface method uses the same tools and the same math, but you will need proper footwear with good grip and should never work on a wet or frost-covered roof.
- Attic method advantages: No roof access required, safer for most homeowners, equally accurate, works on any residential roof with an accessible attic space.
- Roof surface method advantages: Faster if you are already on the roof for another reason, useful for checking multiple roof planes in a single visit.
- When to skip both and call a pro: If your roof is steep (above 9/12), if it is wet or damaged, or if you are not comfortable at heights, have a qualified contractor take the measurement during a free inspection.
- Safety first regardless of method: If you access the attic, watch for exposed nails in the rafters, watch your step on attic joists, and bring a flashlight. If you go on the roof, wear rubber-soled shoes and never work alone.
2. Access the Attic and Locate a Rafter
For the attic method, enter your attic and locate a rafter, which is one of the sloped framing members that runs from the ridge at the peak down toward the eaves. Any rafter in good condition will work. Position yourself so you have enough room to hold the level against the underside of the rafter and read both the level bubble and a tape measure at the same time. Bring a flashlight if the attic is dim.
- What a rafter looks like: Rafters are the diagonal lumber members that form the slope of the roof. They run parallel to each other, typically spaced 16 or 24 inches apart.
- Which rafter to use: Any rafter in the main roof section works. Avoid rafters in valleys or at transitions between roof planes, which may be cut at compound angles that produce a misleading measurement.
- For the roof surface method: Position yourself on the roof surface near the center of a roof plane. Sit or crouch comfortably with your level and tape measure ready before taking any measurement.
- Attic safety check: Before stepping off the attic hatch onto the joists, verify the joists can support your weight and that there are no electrical hazards or loose insulation concealing gaps in the flooring.
3. Place the Level Against the Rafter
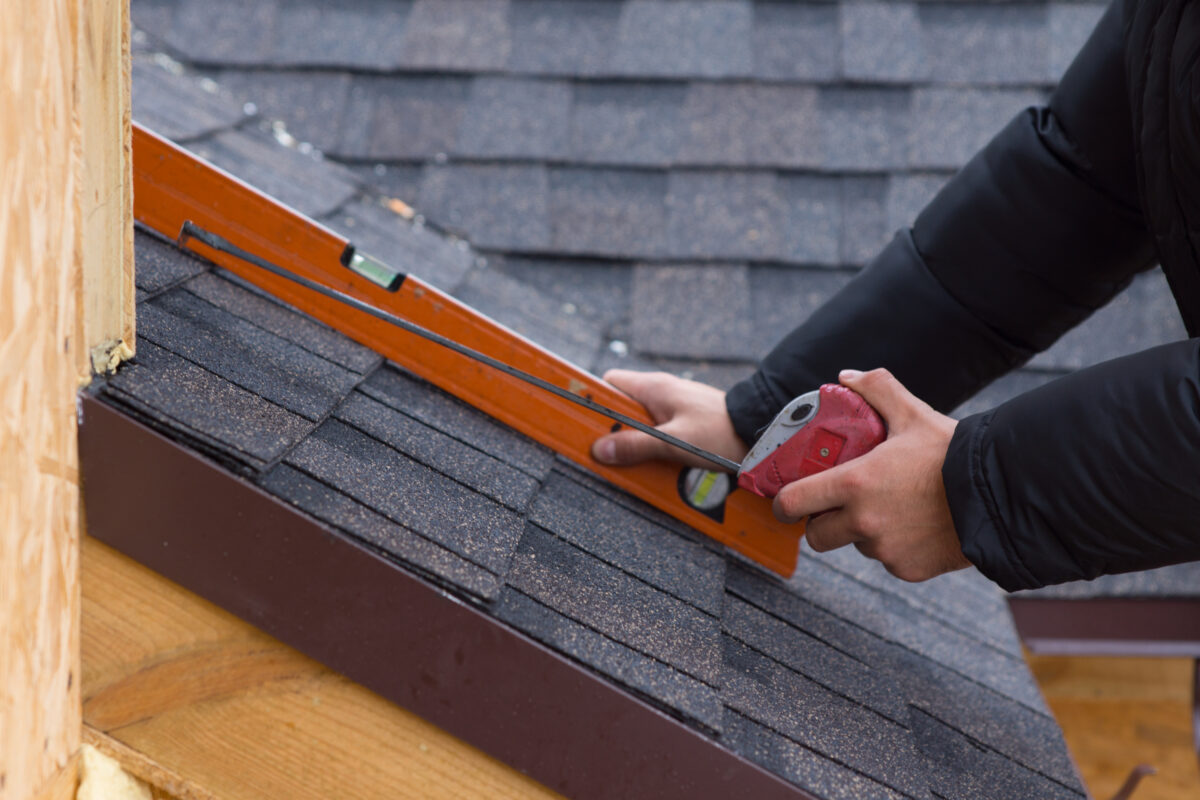
Hold the level flat against the underside of the rafter with one end touching the rafter surface. For the roof surface method, lay the level flat on the shingle surface with one end resting on the roof. In both cases, the level needs to be oriented horizontally, running in the same direction as the slope of the roof, not perpendicular to it. Adjust the level up or down until the bubble is perfectly centered in the vial, indicating the level is exactly horizontal.
- Level orientation: The level runs along the slope of the roof, not across it. It should point from the ridge toward the eave, not from one side to the other.
- Bubble centering: Take a moment to get the bubble exactly centered before taking any measurement. Even a small tilt throws off the rise reading.
- Using a short level: A 12-inch torpedo level works but requires a steadier hand. If you find it hard to hold level and measure at the same time, brace your elbow against the rafter for stability.
- Attic vs. roof difference: In the attic, the level touches the underside of the rafter. On the roof, the level rests on top of the shingle surface. Both give the same pitch reading.
4. Mark the 12-Inch Point on the Level
With the level held horizontal against the rafter or roof surface, use your pencil to mark a point exactly 12 inches along the level from the end that contacts the rafter or roof. This 12-inch mark represents the standard unit of horizontal run used in all residential roof pitch calculations. Every pitch ratio you see, 4/12, 6/12, 9/12, uses 12 inches as the fixed horizontal reference.
- Why 12 inches: Twelve inches is the standard horizontal run unit in residential roofing. It creates a consistent reference point that allows pitch to be expressed as a simple, universally understood ratio.
- Measure from the contact point: Start your 12-inch measurement from the end of the level that is resting on the rafter or roof, not from the other end.
- Mark clearly: Use a pencil or a piece of tape on the level to mark the 12-inch point so it is easy to see when you take the next measurement.
- Double-check the level bubble: Before moving to the next step, confirm the bubble is still centered. Movement while marking can shift the level slightly.
5. Measure the Vertical Rise
This is the core measurement that gives you the pitch. From the 12-inch mark on the level, measure vertically straight down to the underside of the rafter (attic method) or straight down to the roof surface (roof surface method). Use your tape measure held perfectly vertical, not at an angle. The number you get in inches is the rise portion of your pitch ratio.
- Hold the tape vertically: The tape measure must be perfectly vertical, not angled. Angling it even slightly will give you a longer measurement than the true vertical rise and result in an incorrect pitch reading.
- Read to the nearest quarter inch: Roof pitch measurements are typically expressed in whole numbers, but reading to the nearest quarter inch gives you the most accurate result to round from.
- Example: If the vertical measurement from the 12-inch mark down to the rafter is 6 inches, your roof pitch is 6/12. If it measures 4 inches, the pitch is 4/12.
- Attic vs. roof surface: In the attic, you measure from the 12-inch mark down to the underside of the rafter. On the roof, you measure from the 12-inch mark down to the surface of the shingles.
6. Record Your Measurement and Express It as a Pitch Ratio
Write down your measurement immediately. The rise number you measured becomes the first number in your pitch ratio, and the run is always 12. A 6-inch rise equals a 6/12 pitch. A 4-inch rise equals a 4/12 pitch. A 9-inch rise equals a 9/12 pitch. This ratio is the standard format used by roofing contractors, material manufacturers, and building codes throughout North Carolina, South Carolina, and the rest of the country.
- Format: Always express pitch as rise/12. A pitch of 6/12 is sometimes written as 6:12. Both mean the same thing.
- Write it down: Do not rely on memory. Write the pitch on paper or take a photo of your tape measure reading before moving on.
- Low-slope range: 2/12 and below requires membrane roofing systems like TPO, EPDM, or modified bitumen. Standard shingles are not appropriate.
- Standard residential range: 4/12 through 9/12 is the most common range for residential homes and is compatible with most shingle and metal roofing systems.
7. Measure Additional Roof Planes If Your Roof Has Multiple Sections
Many homes have roofs with more than one section, each potentially at a different pitch. A main gable roof may be 6/12 while a shed dormer above a garage is 3/12. Each section needs its own measurement because the pitch affects material quantities, material selection, and labor cost for each plane independently. Measuring only the most visible section and assuming the rest matches is one of the most common mistakes homeowners make when estimating roofing projects.
- Identify each distinct roof plane: Walk around the exterior of your home and count how many flat surfaces make up your roof. Each one that slopes at a different angle is a separate plane.
- Dormers and additions: Dormers, shed roofs over additions, and porch roofs are all common examples of secondary planes that often have a different pitch than the main roof.
- Repeat the steps for each plane: Each measurement requires its own level placement, 12-inch mark, and vertical rise reading.
- Label each measurement: Note which section of the roof each pitch corresponds to, for example, front main roof, garage roof, back dormer, so the information is useful when you share it with a contractor.
8. Verify Your Measurement and Check Your Work
Take the measurement a second time independently to confirm accuracy. Move to a different rafter or a different spot on the same roof plane and repeat steps 3 through 6. The two readings should match. If they differ by more than a quarter inch, take a third reading and use the result that appears twice. Inconsistencies usually come from the level not being perfectly horizontal or the tape measure being held at a slight angle.
- Why verify: A one-inch error in the rise reading changes the pitch by one full unit, which can affect material compatibility and cost estimates meaningfully.
- Check multiple rafters: In older homes, rafters can occasionally shift slightly from their original position. Checking two or three rafters in the same plane confirms the measurement reflects the actual pitch.
- Use the attic and roof methods as a cross-check: If you have the ability to measure both from the attic and from the roof surface, comparing the two readings is the most reliable way to confirm accuracy.
- When readings are inconsistent: Significant inconsistencies between rafters may indicate structural movement or settling in the roof framing, which is worth having a professional assess before starting any roofing project.
What Does Your Pitch Number Mean for Your Project?
Once you have an accurate pitch measurement, it tells you several things about what your roofing project will involve. In Jacksonville and surrounding areas, where storm season brings heavy rain and high winds, pitch plays a direct role in how well a roof performs under pressure.
A pitch of 4/12 to 6/12 is the most common range for residential homes in the Carolinas. Most standard asphalt shingles are approved for this range with standard installation methods, and labor costs are typically in the normal range because roofers can work comfortably on the surface. A pitch of 7/12 to 9/12 is workable for most shingle systems but begins to require additional safety precautions for the installation crew, which can add to labor cost. Pitches above 9/12 are considered steep-slope and require specialized fastening, additional underlayment, and higher labor rates to account for the increased difficulty and safety requirements.
If your pitch is below 4/12, you are in low-slope territory. Asphalt shingles may still be installable with modified methods and specific products down to 2/12, but anything below that requires a full membrane roofing system. Your contractor needs to know this before bidding the job.
Frequently Asked Questions
What is the most common roof pitch on residential homes?
The most common residential roof pitches range between 4/12 and 6/12. A 6/12 pitch is considered a standard moderate slope that works well with virtually all shingle systems, sheds water efficiently, and is safe and practical for roofers to work on.
Can I measure roof pitch from the ground?
Estimating pitch from the ground is possible using a pitch gauge tool or a smartphone app with an inclinometer, but these methods are less accurate than a direct measurement from the attic or roof surface. Ground-level estimates are fine for a rough planning number but should be verified before ordering materials or finalizing a contract.
Does roof pitch affect the cost of a roof replacement?
Yes, directly. Steeper roofs require more labor time and additional safety equipment, which raises labor costs. Most roofing contractors apply a pitch factor or steep-slope charge to roofs above 7/12 or 8/12. Material costs may also be slightly higher on steep roofs because waste factors increase as pitch increases.
What pitch is too steep for asphalt shingles?
Asphalt shingles can technically be installed on pitches up to 21/12, though very steep roofs above 12/12 require special fastening methods specified by the shingle manufacturer. The more practical limit for standard installation is around 9/12 to 12/12, above which labor costs and safety requirements increase significantly.
What happens if roofing materials are installed on the wrong pitch?
Installing materials outside their approved pitch range voids the manufacturer warranty, creates water infiltration risk, and may violate local building codes. Shingles installed on a pitch that is too low will not drain properly and will fail prematurely. Membrane systems installed on a pitch that is too steep may not adhere correctly.
Should I measure my own roof pitch or have a contractor do it?
Either approach works. Measuring it yourself gives you a useful baseline before getting quotes, and the method in this guide is straightforward for most homeowners. A professional contractor will measure it as part of a free inspection, and their measurement will typically be part of the formal project assessment.
Stormgrade Makes Every Roofing Project Start the Right Way
Understanding your roof pitch is a smart first step, but the next step is getting eyes on your roof from someone who knows what they are looking at. Stormgrade is a family-owned, GAF Master Elite, BBB Accredited roofing contractor serving homeowners throughout North Carolina and South Carolina, including Jacksonville and surrounding areas. We offer free inspections that cover pitch, material condition, underlayment, ventilation, and anything else that affects how your roof performs.
Whether you are planning a full replacement, dealing with storm damage, or just trying to understand what you have before making any decisions, our team gives you clear answers and honest recommendations. Financing is available, warranties are available on both materials and workmanship, and our maintenance program keeps your roof in top condition year after year.
Reach out to Stormgrade today to schedule your free roof inspection.